
Ideas for Displaying Pictures!
Do you get photos taken and then never do anything with them? I have to admit, I am NOT one of those people. I have always loved displaying photos in my home, even before I got more interested in photography. So today I’m sharing what I do to display my photos! Let’s get those cute family photos up on your wall people!
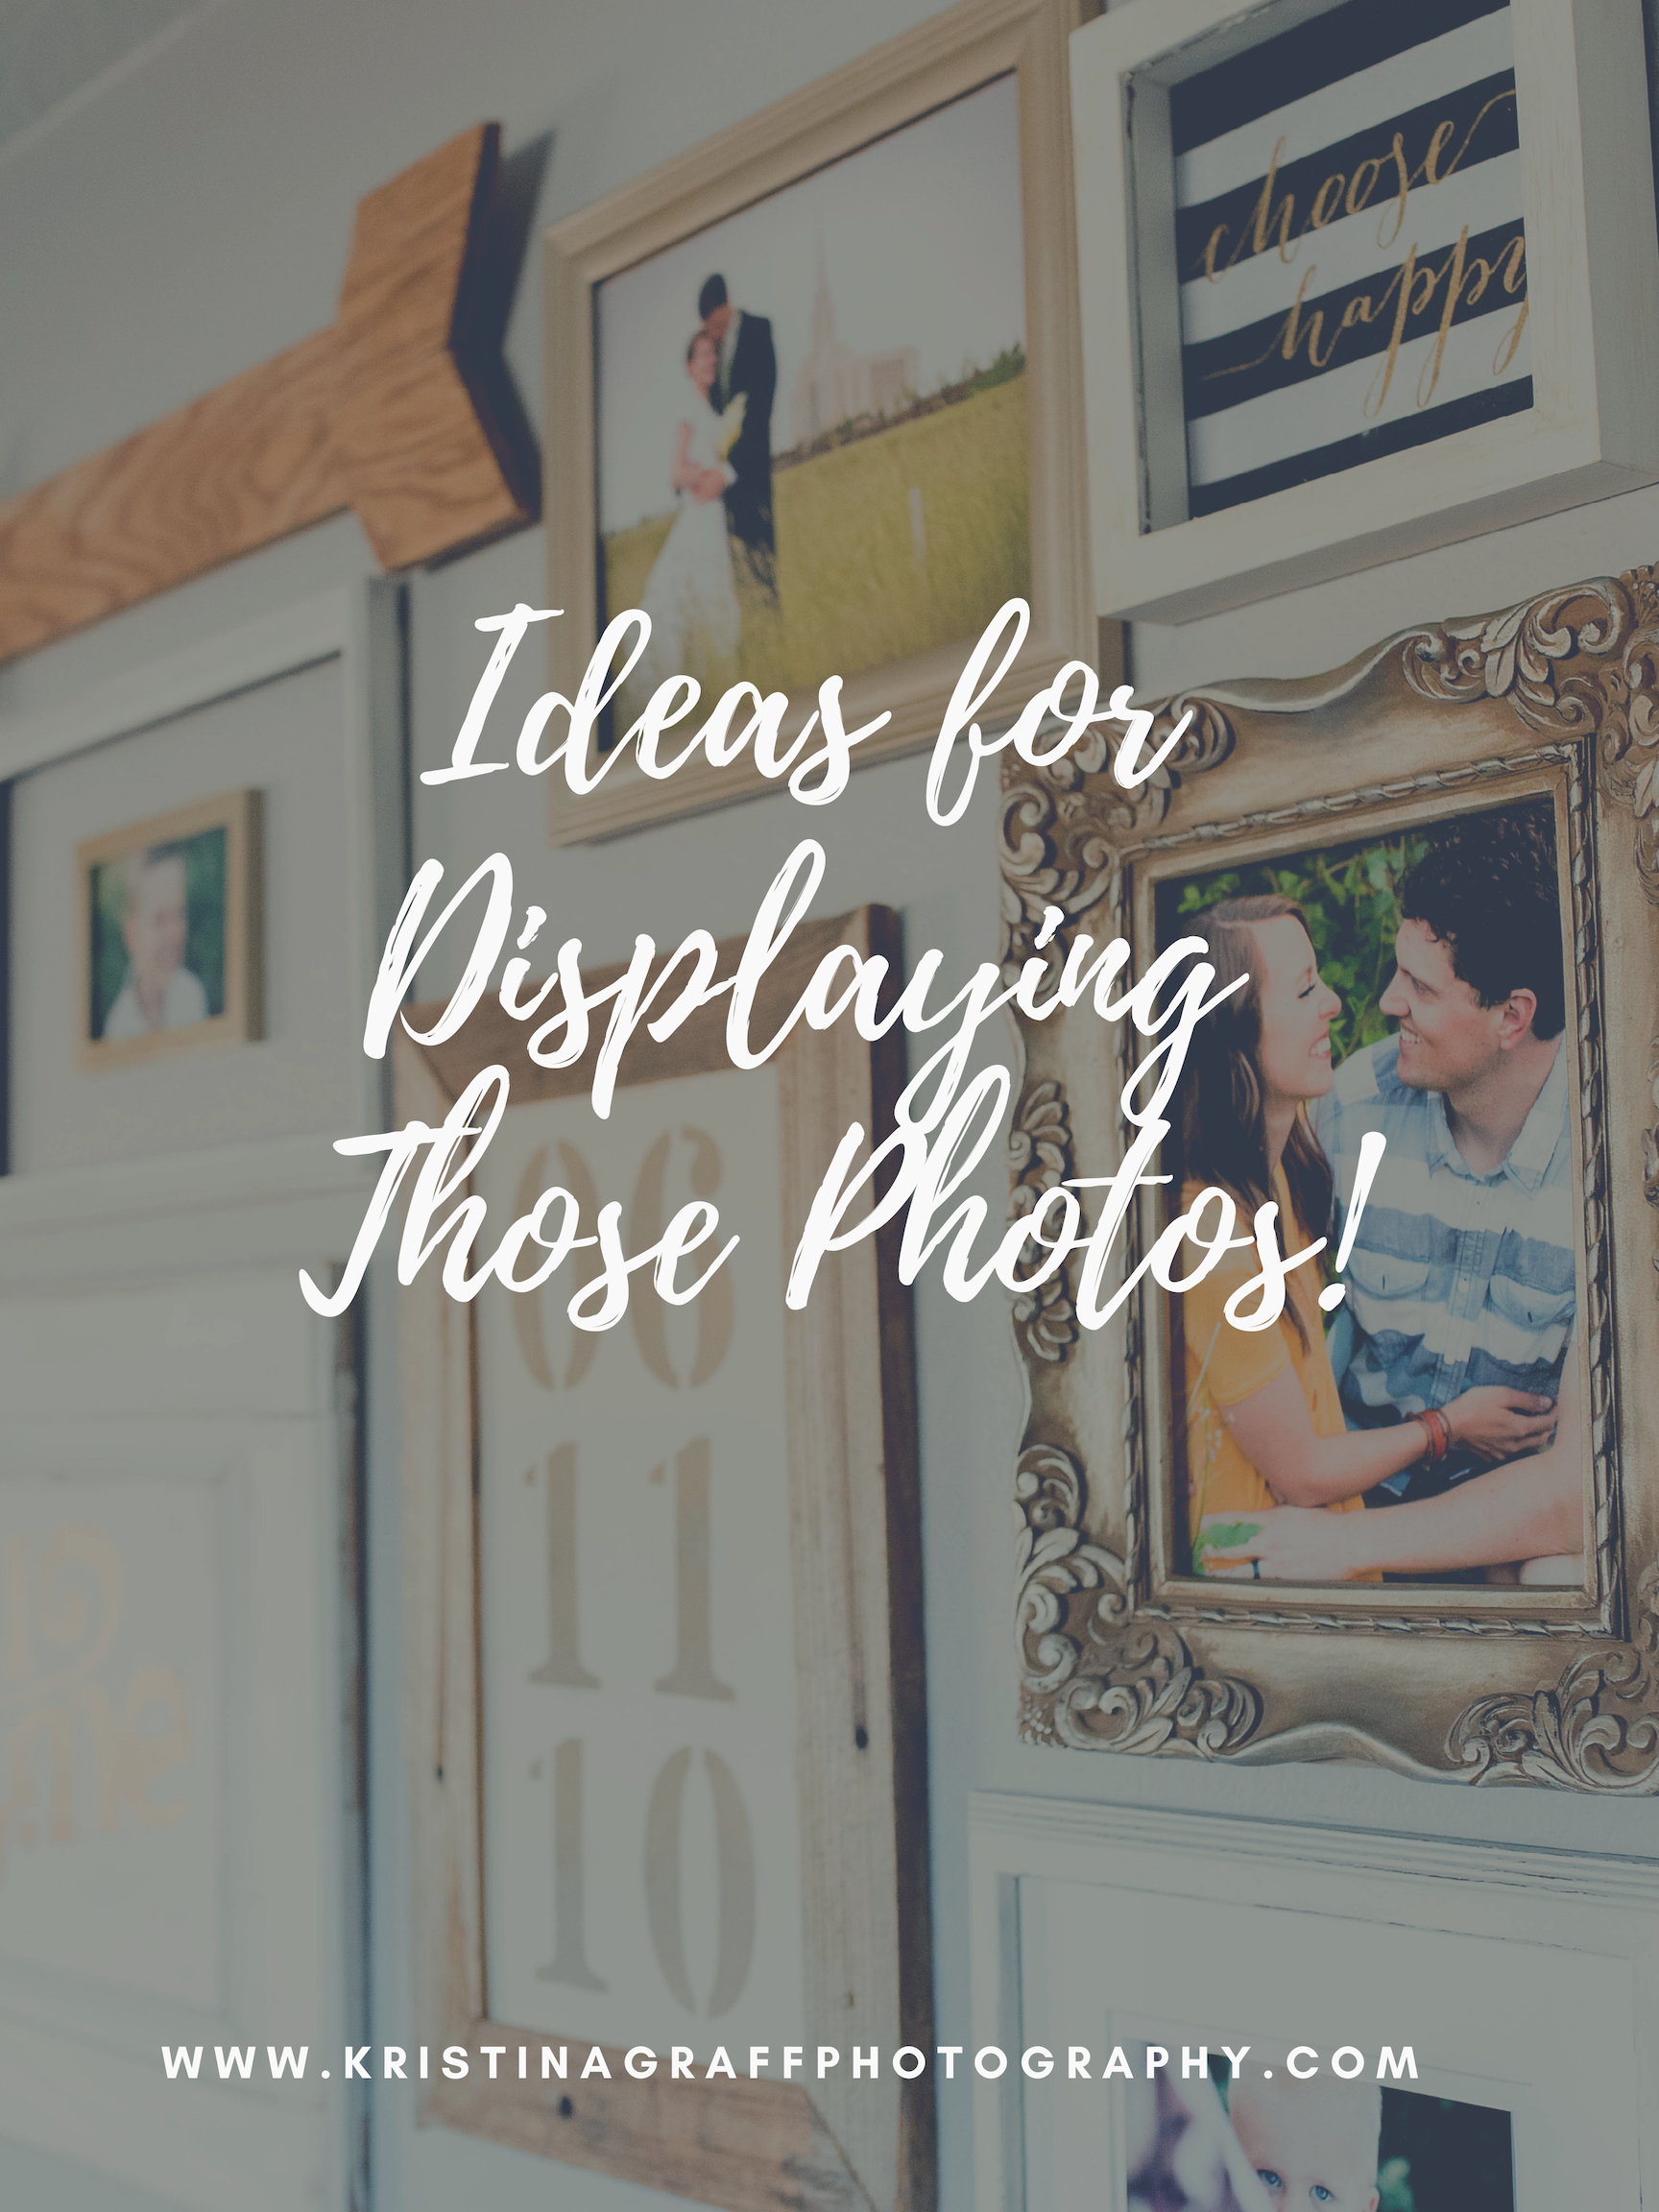
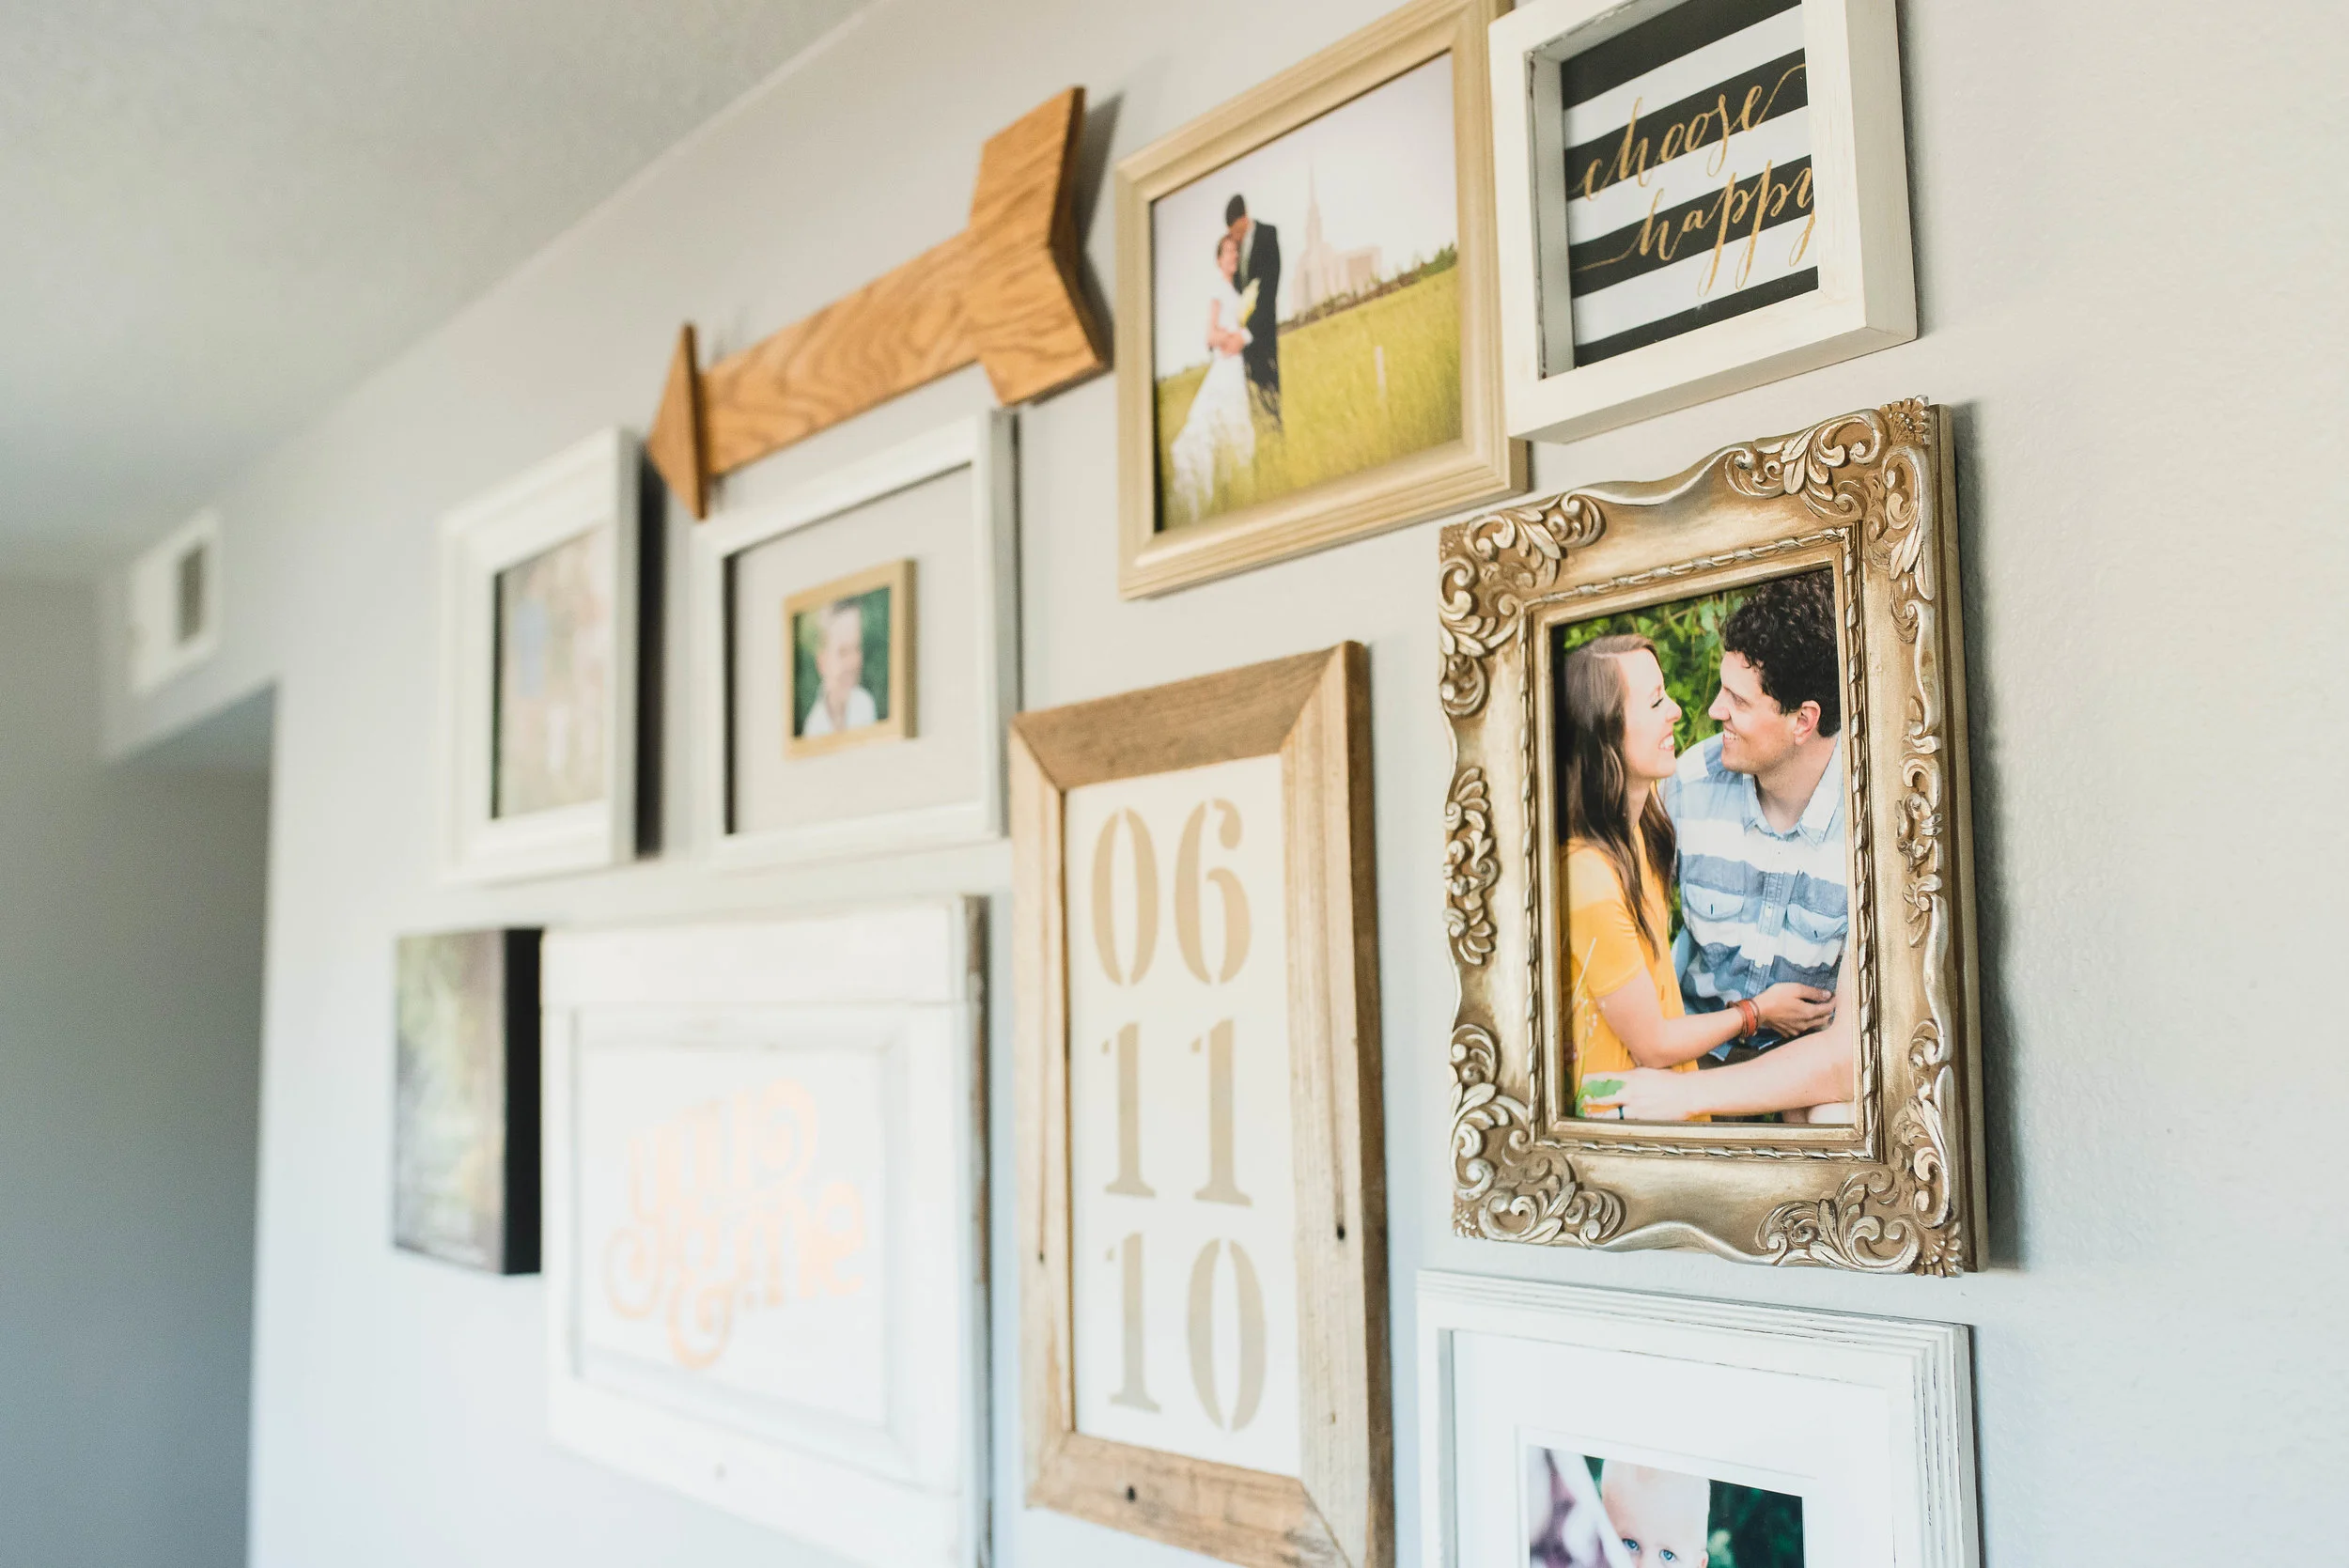
My favorite way to display photos is by doing a gallery wall! I have these up all over my house. I love them for a couple different reasons:
They’re versatile! If you want a more geometric look, get all the same frames in the same sizes and hang them in a square. If you want a more irregular pattern, get different shapes and frames. Either option looks great.
They’re inexpensive (or can be). I have to be honest, most of my frames come from thrift stores. They’re my favorite place to get frames because all you have to do is find a good shape and the right size, color doesn’t matter. Then when you get them home spray paint those babies to go with the color scheme you chose. Then you’ve got a whole wall full of frames that would’ve been the cost of one frame at the store.
You can incorporate other meaningful/fun items besides just frames and photos. I love incorporating quotes, fun images, things I want to remember, etc. My favorite is the sign I made of my wedding date that hangs on the gallery wall in my room!


I personally love figuring out layouts for gallery walls, but I know some people struggle so here are a couple of quick tips:
Pick a color scheme!
I would say no more than three colors in general. It just helps it look cohesive and like you put them together on purpose instead of just slapped them on the wall. However, I do have a friend that has a really fun gallery wall going up her stairs and her scheme is COLOR and it totally works and is super fun.
Incorporate different shapes
It can be kind of challenging, but incorporating different shapes really helps add more visual interest to your gallery. I love the oval shapes I have in the collage in my living room.
Lay things out on the floor first, and take pictures of each different layout.
This is what I’ve done EVERY. SINGLE. TIME. It totally helps see where shapes balance out better in one version verses another so you can tweak, find the best version, and not go crazy because you can’t remember what you’ve done.
Take a picture of your final layout and use that to help you hang them up!
This helps me get the spacing just right.
Here are some other ideas:
-I have these boards hanging up in my boys’ room for their artwork, but they would be great for photos as well! It would be super easy to change out photos and keep it looking new and different.

Ignore the Spiderman poster on the wall, ha!

-Use a big frame to fill up a wall or as a focal point.
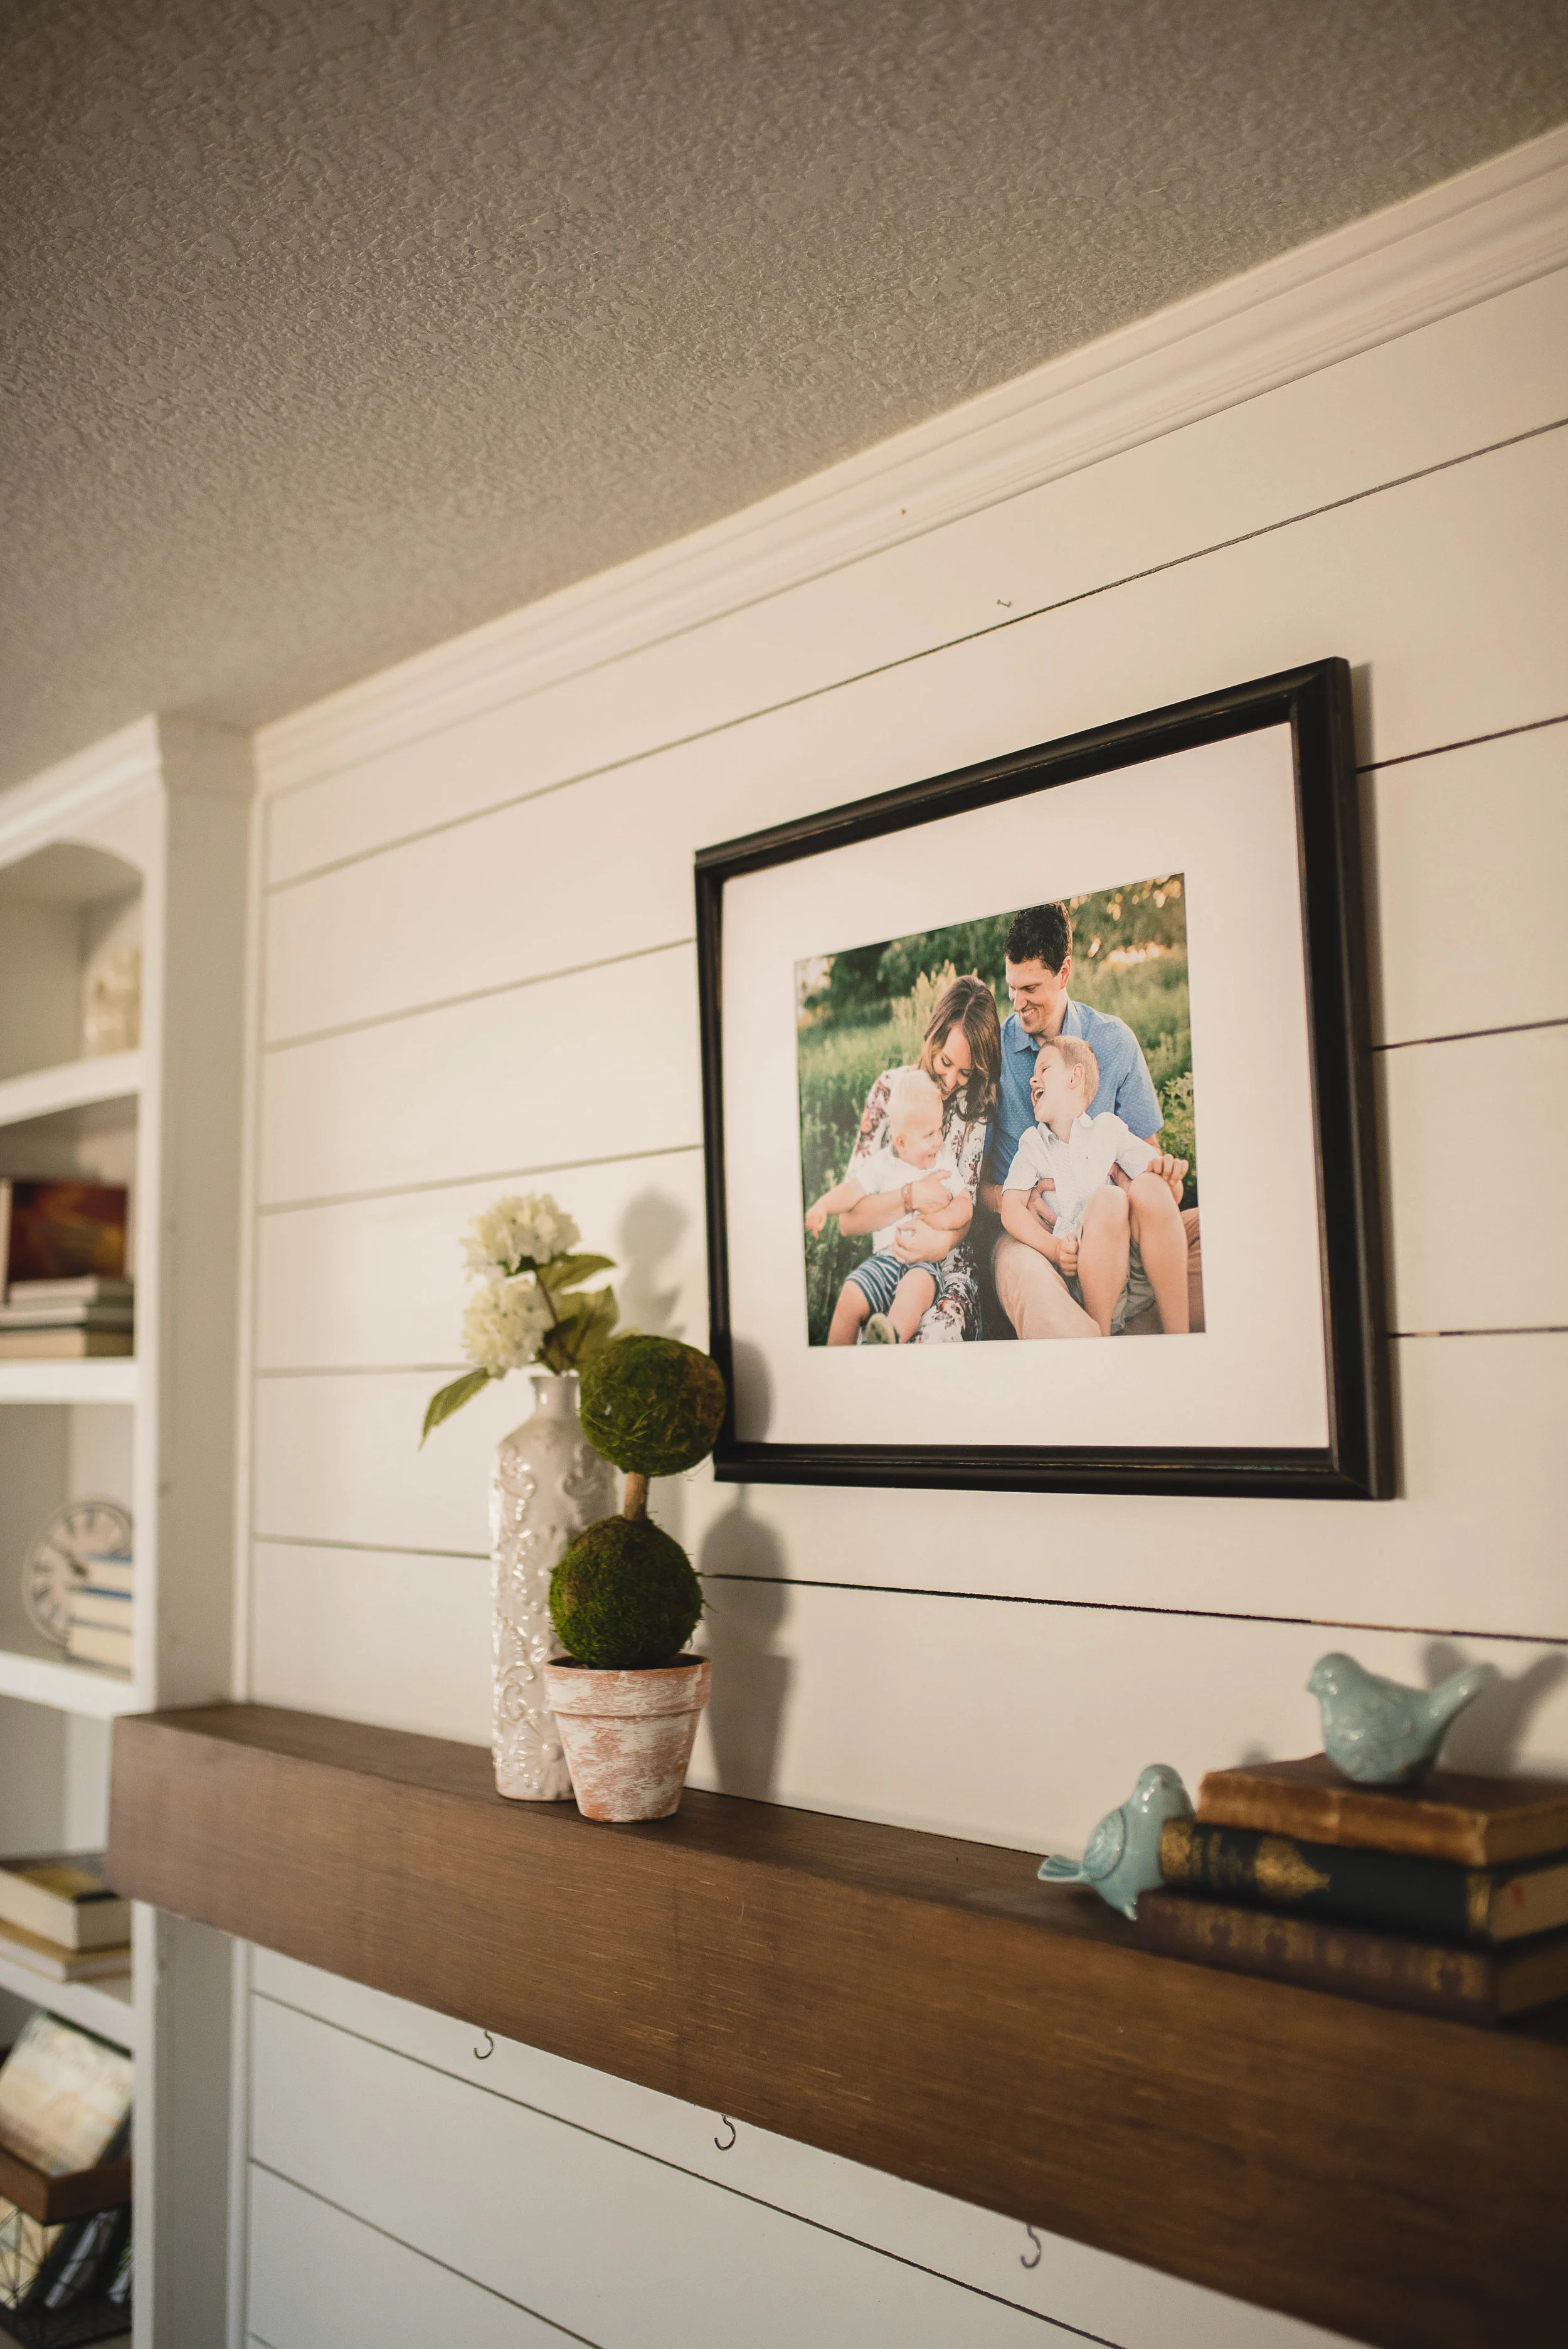
I use this big frame as the focal point over my fireplace.
-I incorporate frames all over my house. I use them in my bookshelves and nightstands, and I have my yearly photo books on display.

Photo of my cute hubby on my nightstand.

A SUPER old picture of me and my sister at my wedding! It’s on the bookcase in my room.
-I created a Pinterest board with some more ideas! Check them out here: https://www.pinterest.com/kristinagr/ideas-for-displaying-photos/
Hope this helps give you some ideas that you can easily incorporate in your house! Have an awesome week!