
How I Edit My Photos!
Today I'm sharing all about how I edit! My style, process, and some of my favorite edits!

My style:
I would describe my style of editing as minimal. I want the scene and the people in the scene to look as flawless as possible, but I also want to keep things looking real. That means I don't do a lot of color altering or editing that adds fake sun flare, or a lot of altering the background. For the most part, if it wasn't there when I was shooting then I don't want it there in the final result! However, if there are distracting elements in the background of my images, such as a big billboard, a sign, or some bright yellow chords that were impossible to keep out of the shot, then I definitely will edit those out.


I love the bright and airy look in photography, but I also love darker images and deep rich tones. So depending on the session and the photo, you might see a little more of one than the other, or a good mix. I also love high contrast images, and you'll see that style of editing a lot in my work.
My process:
1.Cull
The first thing any photographer does before they start editing is to go through and cull the session. Basically, I decide which photos are winners and which ones I'll pass on. I used to do all my culling in Lightroom (where I do the majority of my editing), but thanks to a trick I learned from Kylee Olivia Photography on a retreat, I now use a program called Bridge. It's sooo much quicker to cull in Bridge than in Lightroom. I go through all the photos, put a quick 5 star rating on the photos I love, and then drag those photos into a new folder on my desktop. I then import all the culled photos into Lightroom. Most of the time I'll end up getting rid of a couple more photos as I edit, maybe because I have another one that's very similar or the focus or framing wasn't as good as I thought it was. But culling in Bridge has saved me so much time!

2. Edit
Next I go through each photo and decide how I want to edit it. To every photo I usually adjust the color temperature just a touch, sometimes the exposure, add some tone curves, and detail. Depending on the photo, I'll spot remove/heal, do some split toning to warm up skin tones, add some clarity (especially to those black and white photos!), and do beauty edits like brighten whites of eyes, darken eyebrows, and smooth skin. All of these edits are very slight, I don't think a client would even be able to tell I had done all those things.
Here are some examples:

Here the image was just a little to hazy for my tastes so I had to bring in more blacks.

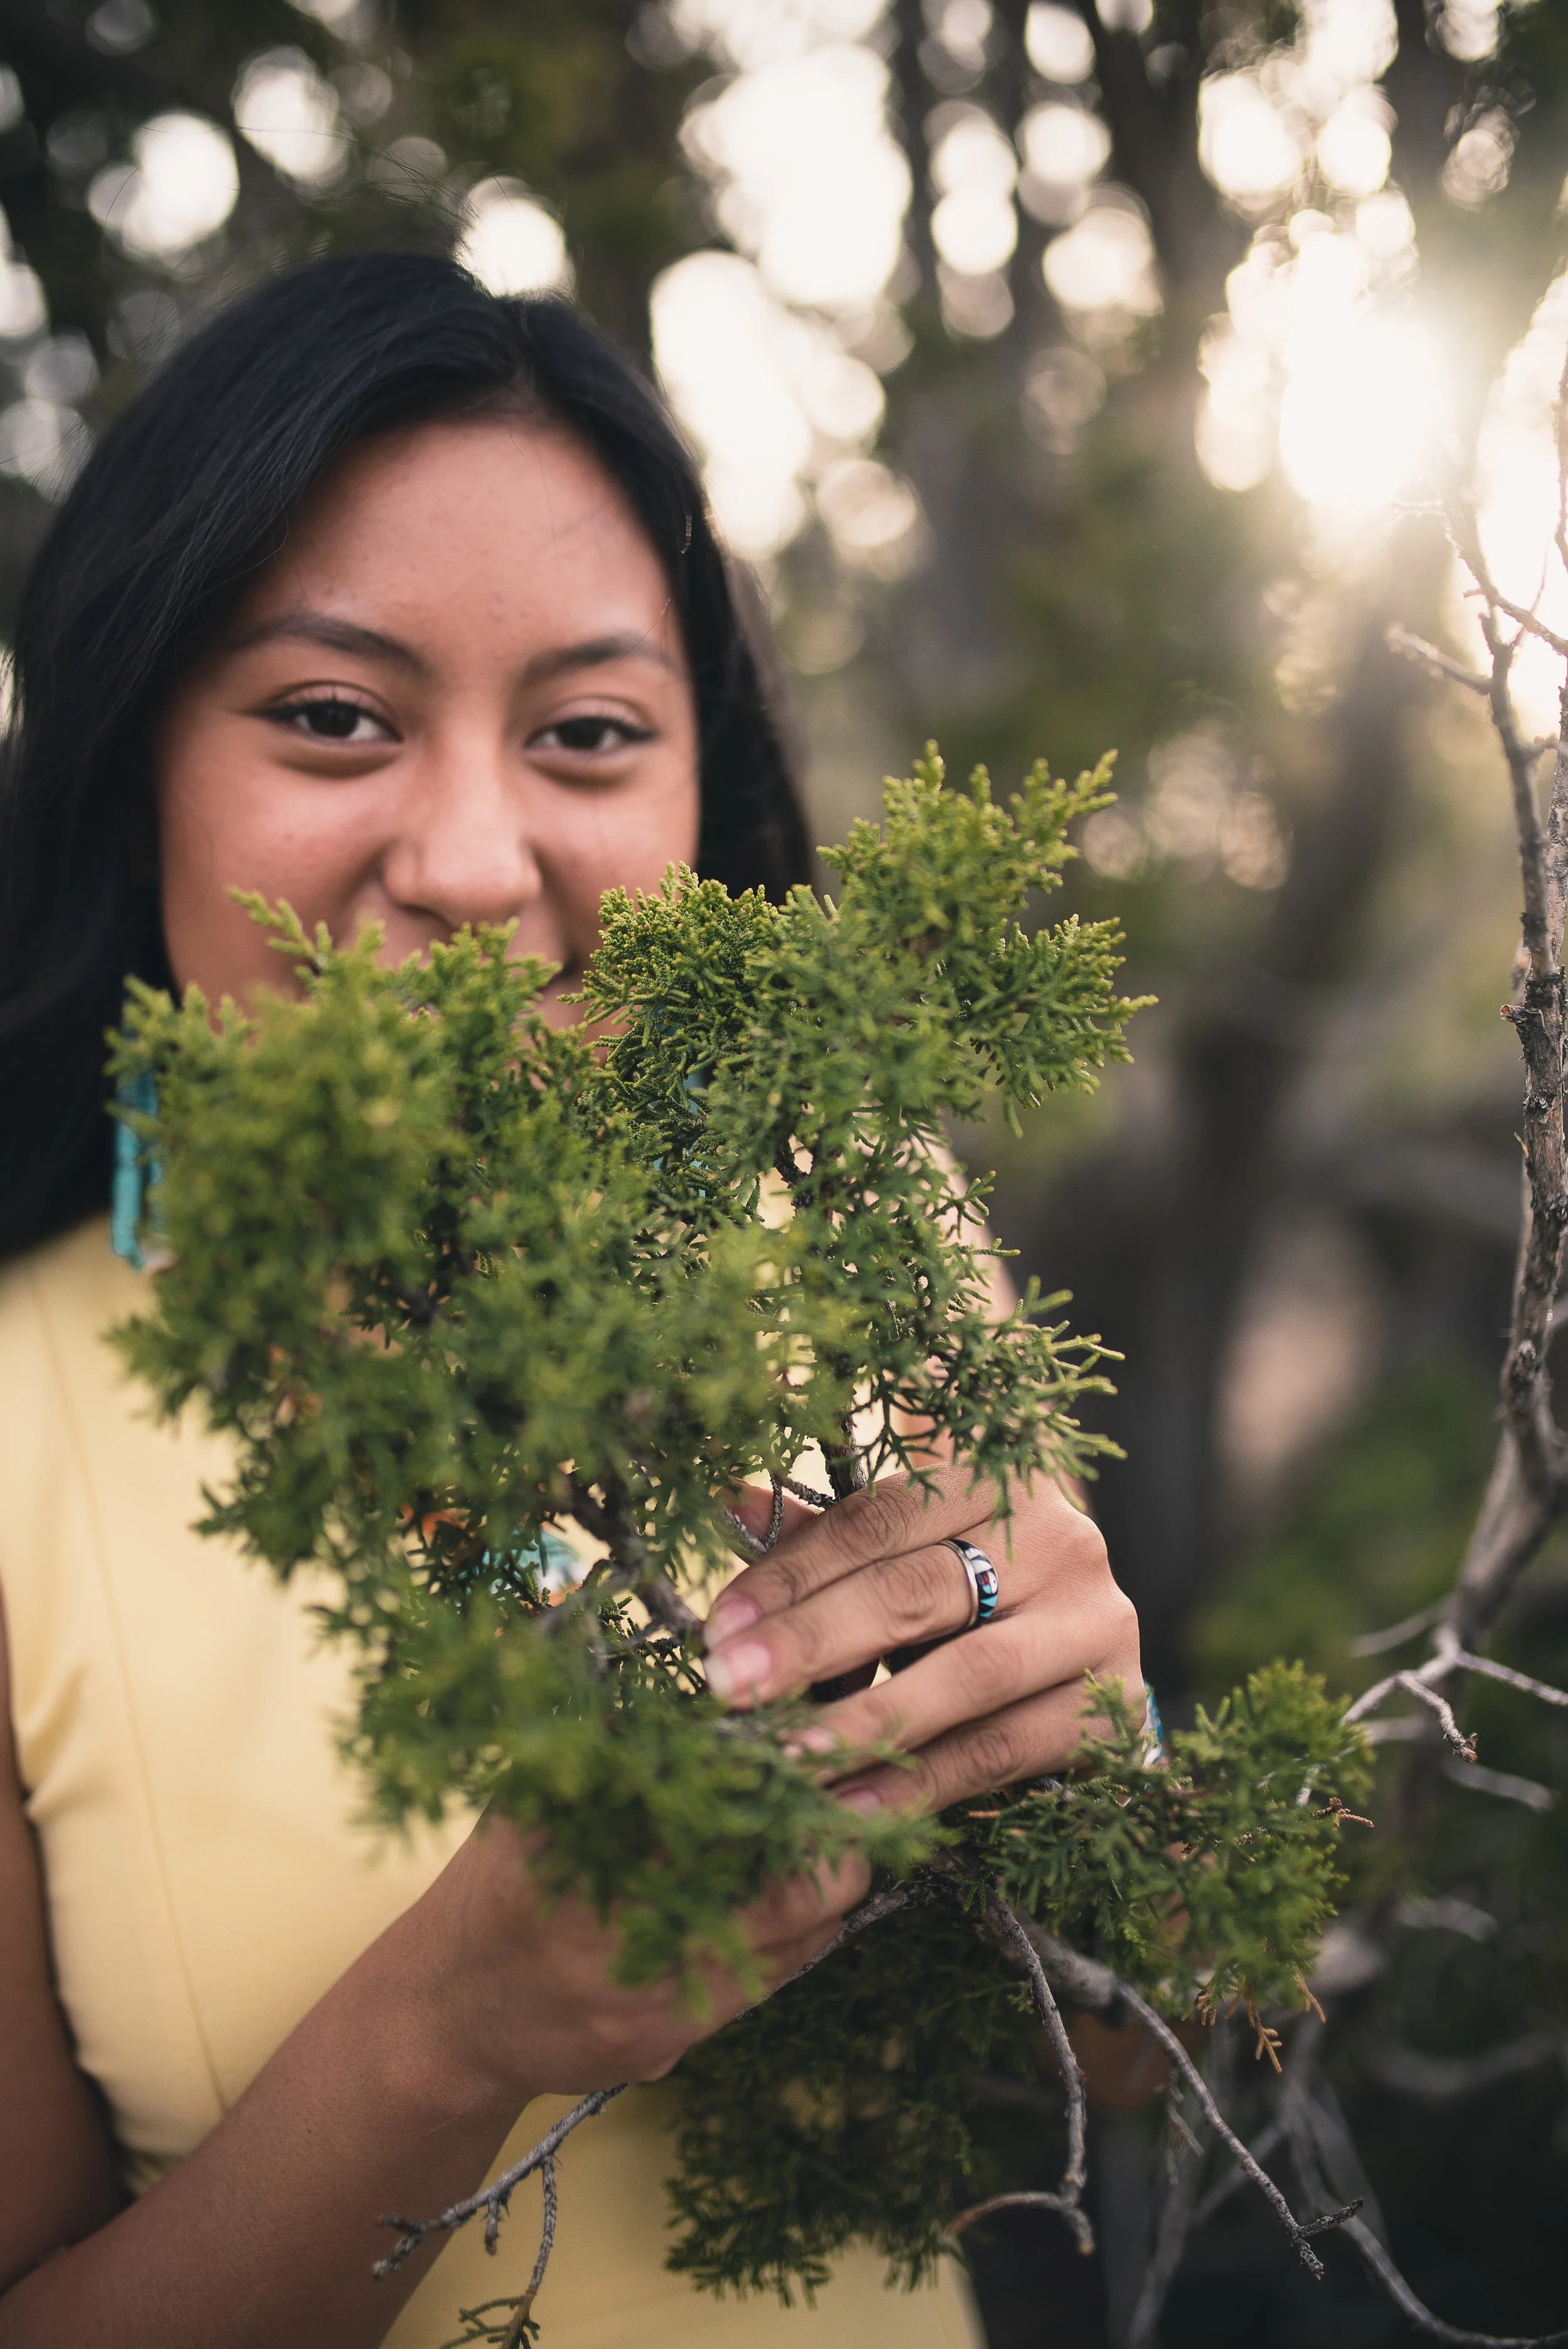
Just some slight beauty edits to make her eyes really pop!
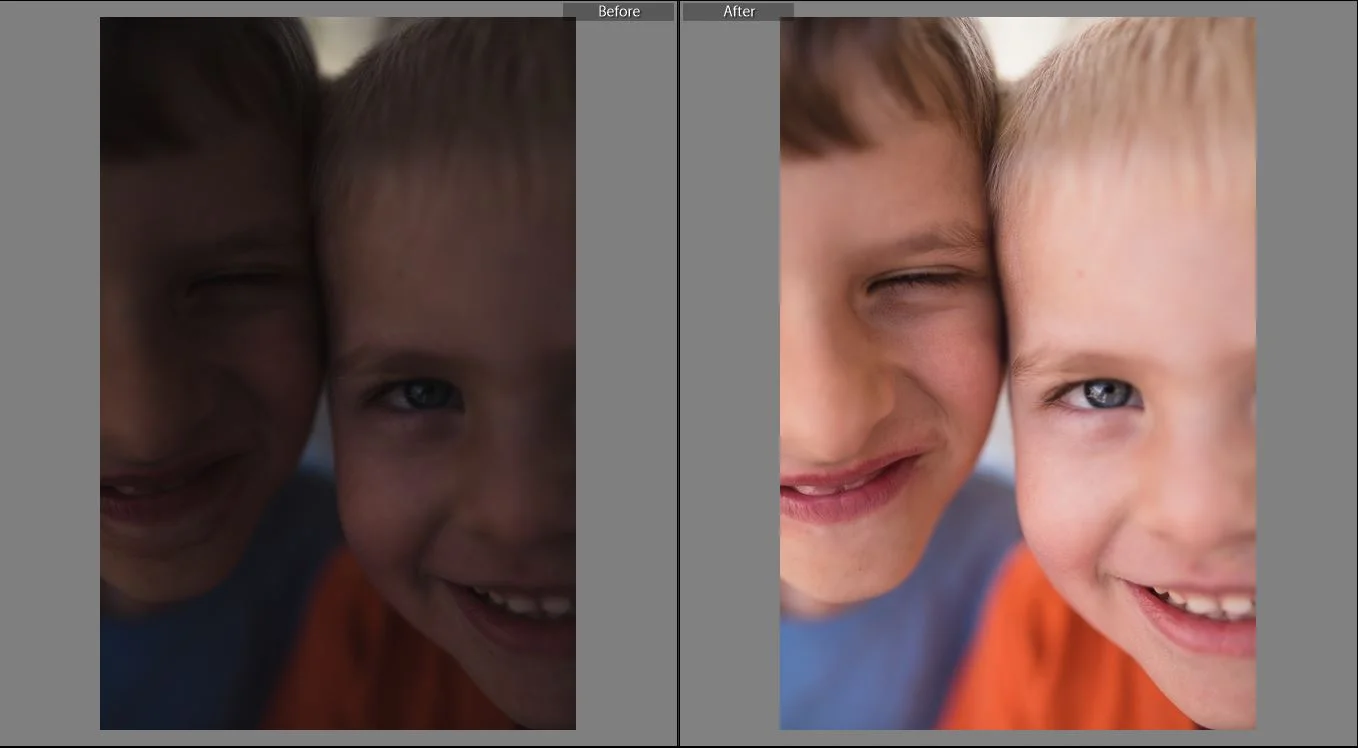
I obviously didn’t check my settings before I shot this one! The biggest difference here is obviously exposure, but if you look closely in the before my oldest has chocolate all over his face. Definitely didn’t want that in the final image so I edited that out as well.
Well, that’s it for today! Hope it was fun to see some before’s and after’s! Have an awesome day!